Configure and connect the CMS webshop to AzerothCore
Connect the CMS to AzerothCore
1. Enable SOAP in your core
- go to the
worldserver.conf - change the parameter
SOAP.Enabledto1 - use an account with gmlevel 3 in AzerothCore
2. Connect the CMS with your game server
- if you use localhost put as
SOAP.IPyourLOCAL IP(e.g.:192.168.x.xor0.0.0.0) - go to the admin panel of the CMS (
localhost/wp-admin/admin.php) - on
Plugins -> Installed Plugins ->activateAzerothCore Wordpress Integration - go to
Settings -> Acore Settings Panel, fill all the fields with the credentials and save (data is pre-filled with some default values, copy those and save) - after saving the settings changes you can verify SOAP using the button
Check SOAPit should return a similar messageSOAP Response: AzerothCore rev. cbd74ae66365+ 2024-09-09 10:46:15 +0000 (master branch) (Unix, RelWithDebInfo, Static) Connected players: 0. Characters in world: 0. Connection peak: 0. Server uptime: 1 hour(s) 55 minute(s) 35 second(s) Update time diff: 2ms. Last 500 diffs summary: |- Mean: 1ms |- Median: 1ms |- Percentiles (95, 99, max): 2ms, 3ms, 4ms - if you encounter errors, please see the Troubleshooting section below for more details.
Important: If the registration fails it can depend on the permissions of your local mysql database, be sure to grant the permission to external connection (like the docker container with wordpress inside can access to the mysql database).
Important: Some of the shop elements will not load properly if your database credentials are incorrect, such as the Add to Cart button on the product page.
Register account on the game server
Wordpress by default does not allow the registration from any user, so you first need to enable the registration going to Settings -> General and check next to Membership the option Anyone can register.
Now, when a user will register on your website, after the verification email process, the CMS will register an account on the game server.
For the verification email process there are several different options:
a. install a Mail Server in your webserver (you can find a lot of guides online)
b. install the plugin WP SMTP via Admin Panle -> Plugins -> Add new and configure it with gmail or other SMTP server, you just need to have a mail like GMAIL and connect it to WP.
I recommend you to install the plugin Manage Notification E-mails to manage in detail the email sending from your website to the users or to the admins.
If you encounter errors, please see the Troubleshooting section below for more details.
Enable the shop
To add the shop in your website selling items and services you have to:
- install and configure WooCommerce plugin using
Admin Panel -> Plugins -> Add new(you can skip the configuration and remove all the shipment options).
Now the pages likeCart, Shop, Checkoutwill be created and added into your menu, you can edit them fromPages.
Remember to set the right currency and manage all the related woocommerce settings.
- create a product
- go to
Admin Panel -> Product -> Create new product - set the product as
Virtual - put a price in the
Generalsection - set the SKU as
itemsend_28773to sell the item 28773(Gorehowl)
- go to
- well, you are selling items but there are no payments method you can install the plugin
WooCommerce PayPal Checkout Payment Gatewayto add PayPal but you can also add other plugins to add more payment method (example:Woocommerce Stripe Gateway).
After the installation remember to enablePaypal standardfromAdmin Panel -> Woocommerce -> Settings -> Paymentsand enable PayPal standard, later click onManageand add your email to receive the payments.
-
(optional) install the plugin
myCredto add “virtual points” in your website, this will allow you to define a relation between money and your virtual point, so any user can buy items in the shopt through virtual points and buy virtual points with €/$

Besides items you can also sell:
- Guild Rename (using as SKU
guild-rename) - Character Rename (using as SKU
char-change-name) - Character Customization (using as SKU
char-change-customize), include rename - Change Race (using as SKU
char-change-race), include rename and customization - Change Faction (using as SKU
char-change-faction), include rename and customization - Restore Deleted Characters (using as SKU
char-restore-delete), this order should be “sold by individually”, limiting the purchase 1 item per order. - Item Restoration (using as SKU
item-restoration), this allows to restore the item deleted or sold (checkItemDeleteworldserver conf) - Carbon Copy tickets (using as SKU
carboncopy-tickets), this works only if you have the CarbonCopy lua script. - Transmog item and itemset (using as SKU
transmog-item_ITEMIDandtransmog-itemset_ITEMSETID), this works only if you have the Transmog module - Name Unlock (using as SKU
name-unlock), this frees up a character name if unused for a while. - Smartstone vanity (using as SKU
smartstone_CATEGORY_VANITYID), this add a vanity (pet, combat ecc.), it requires the module Smartstone module.
Note: if you want to sell a cumulative item you can use the SKU itemsend_ITEM-ID_stack.
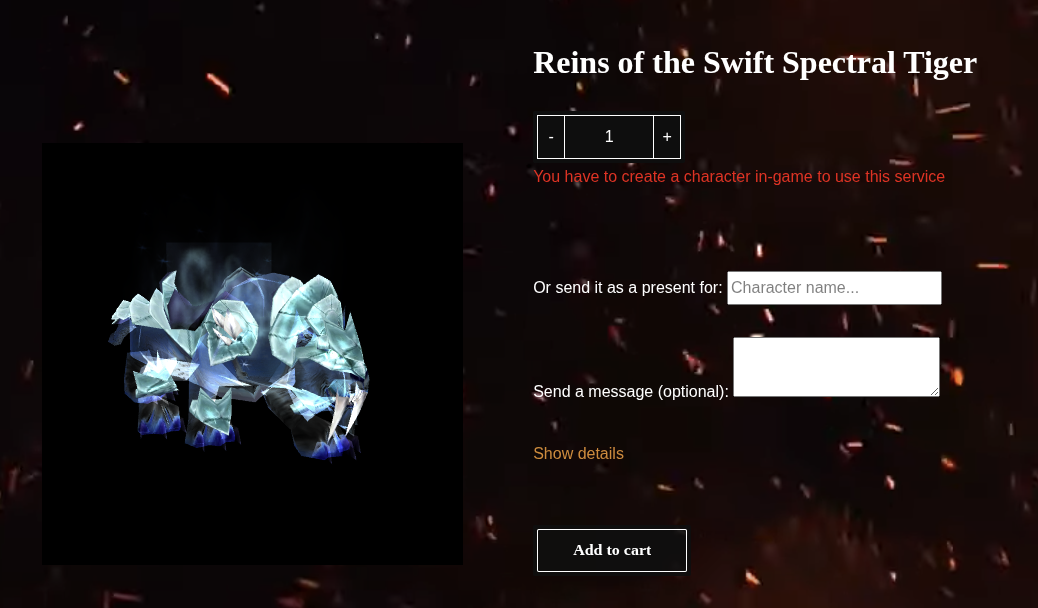
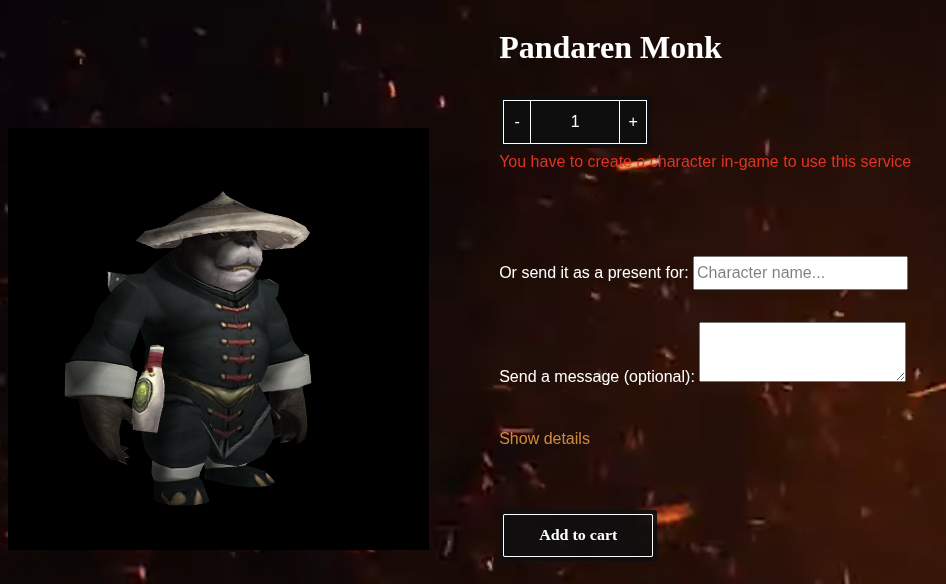
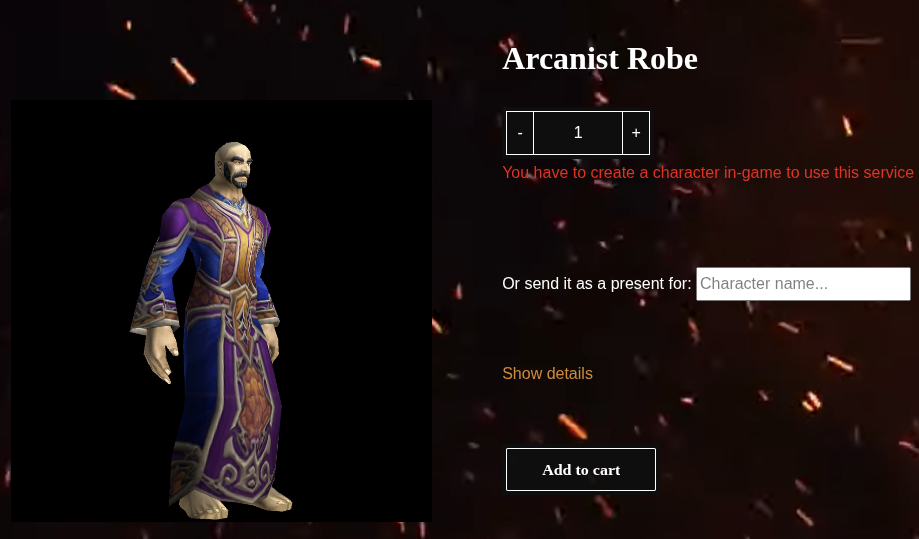
3D Model Viewer
In any product it is possible to enable/disable the 3D viewer via settings on Inventory -> 3D Viewer.

It currently suports:
- mounts/pets/companion under itemsend SKU
- transmog items under transmog-item SKU
Examples:
Troubleshooting
For everything ask help on Discord in the channel #acore-cms (section TOOLS), you can also tag @Helias for any issue about this CMS.
Error: could not be connect to the host (during the registration)
Check the SOAP configuration in worldserver.conf and into the CMS on Admin Panel -> Settings -> Acore Settings Panel.
To check the SOAP connection between CMS and AzerothCore server you can use the php script from here or you can use the bash script provided below.
Click to expand and see the bash script with curl
```bash #!/bin/bash # SOAP connection info SOAP_URI="urn:AC" SOAP_HOST="localhost" SOAP_PORT="7878" ACCOUNT_NAME="admin" ACCOUNT_PASSWORD="admin" # SOAP request body template SOAP_REQUEST=" <SOAP-ENV:Envelope xmlns:SOAP-ENV=\"http://schemas.xmlsoap.org/soap/envelope/\" xmlns:ns1=\"$SOAP_URI\">Error: SOAP Response: Error 403: HTTP 403 Forbidden
You are probably using an account with gmlevel less than 3, you should upgrade it to 3 with:
account set gmlevel USERNAME 3 -1
replacing USERNAME with the game account name.
During the registration I get some “PDO errors” OR “Host is not allowed to connect to this mysql”
For both, the problem is probably related to the permissions of the access to your local mysql database. How to solve: edit the mysql permission and create a new user.
Edit the mysql permission of mysql using:
sudo nano /etc/mysql/mysql.conf.d/mysqld.cnf
Change the bind-address option into 0.0.0.0 to allow the access from any IPs or just put the specific IP address allowed to connect to the database.
Create a new mysql user, like “acore” with:
CREATE USER 'acore'@'localhost' IDENTIFIED BY 'some_pass';
GRANT ALL PRIVILEGES ON *.* TO 'acore'@'localhost' WITH GRANT OPTION;
CREATE USER 'acore'@'%' IDENTIFIED BY 'some_pass';
GRANT ALL PRIVILEGES ON *.* TO 'acore'@'%' WITH GRANT OPTION;
Update the configuration into Wordpress Admin Panel -> Settings -> Acore Settings Panel with the new user and do not set “localhost” but the LOCAL IP ADDRESS of your machine.